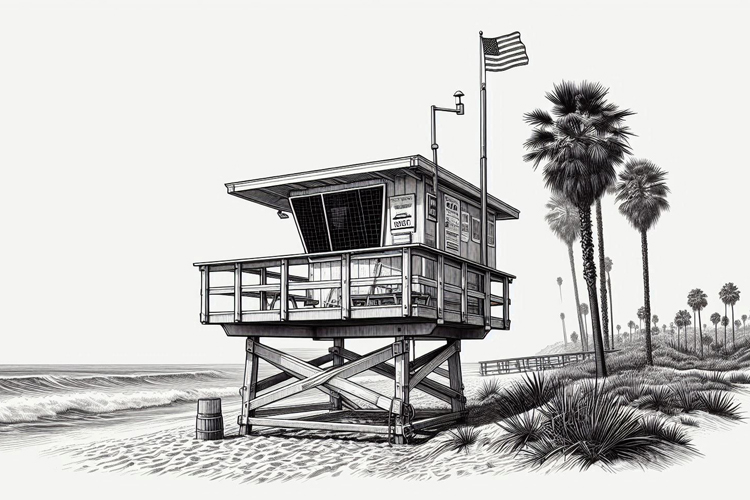
The lifeguard tower is an American landmark and an architectural symbol of US beaches and ocean safety. Learn how to draw these classic seaside structures.
They’re all over the North American coastline, and they help save lives.
Lifeguard towers provide a privileged, taller view over the ocean and allow trained, certified rescuers to watch and perform surveillance routines in their designated areas.
Whether witnessing a potentially life-threatening drowning event or spotting sharks in the vicinities, lifeguards can better supervise the swimming zone from these open or enclosed wooden structures.
Lifeguard towers have constantly been featured in pop culture and have become the focus of attention in the world of arts and architecture.
The famous 11-season TV series “Baywatch” was shot at Will Rogers State Beach in Pacific Palisades, California, the home of several blue lifeguard towers.
But have you ever thought of drawing one of these beach life structures and hanging it on a wall?
Are you willing to give it a try? We can help.
Follow our simple, step-by-step lifeguard drawing tutorial and impress your family and friends. It’s easier than you think.
Drawing Materials
- Sketchbook or drawing paper;
- Pencil (preferably HB or lighter);
- Eraser;
- Ruler (optional, but try to avoid for a more organic look);

Drawing Instructions
Follow these instructions to create a beach scene that brings summer vibes to your artwork.
This drawing uses a one-point perspective, meaning that the objects’ faces parallel the viewer and converge at a single vanishing point on the horizon line.
Do it. It’s simpler than you think – just pay attention to the 20-step guide and, if needed, watch the video below.
- Begin by lightly drawing a horizontal line in the middle of your paper. It will be the base of the tower and should be about six inches long if using a 12-inch sketchbook;
- Divide this line into thirds and lightly make small marks at each third. These will help guide the placement of different parts of the tower;
- Draw a vertical line from the leftmost third mark. It will be the left edge of the lifeguard tower;
- Next, draw another vertical line slightly right of the middle third mark. It will form the front face of the tower;
- Connect the tops of these vertical lines with a horizontal line. It will be the main railing of the lifeguard tower;
- Add two more vertical lines, one to the far right and one slightly right of the middle. These will form the base’s back supports;
- Connect these vertical lines with horizontal lines to complete the base structure;
- Add planks or boards to the base by drawing horizontal lines within the structure;
- Draw the vertical support beams under the platform. Remember, these beams may not be perfectly straight to give a freehand, handmade, organic look;
- From the top of the left vertical line, draw an upward-sloping line to the right to indicate the roof’s edge;
- Complete the roof by adding a horizontal line at the top of the right vertical line and connecting it to the slope;
- Lightly sketch a rectangle for the window in the tower’s front face. Ensure the window aligns with the perspective;
- Add any additional details like window frames, small posters, or a door at the bottom of the tower;
- Mark the top of the lifeguard’s head and the bottom of their feet to determine the height. Use the proportions provided: divide the height into upper body, lower torso, and legs;
- Draw the lifeguard with binoculars and casual beach attire, keeping proportions in mind, and add details like sunglasses and hair;
- Darken the main lines and add details like nails or bolts on the planks;
- Shade areas of the tower to indicate shadows, giving it a three-dimensional look. Consider the direction of sunlight and shade accordingly. Use three tones to create depth: light, middle, and dark;
- Add a flag or antenna on top of the tower;
- Draw a shadow under the tower to anchor it to the ground;
- Personalize your tower with additional elements like rescue buoys, surfboards, or beach gear;
Extra Tips
Keep your initial lines light to make erasing, adjustments, and other corrections easier.
Focus on the structure’s symmetry, but allow some imperfections to create a more realistic and organic, handmade appearance, for instance, by avoiding rulers here and there.
Be patient and remember that practice makes perfect. If something looks off, try redrawing the section until you’re satisfied.
Words by Luís MP | Founder of SurferToday.com


